AWS WorkMail is being retired, with end of support scheduled for 31 March 2027. I have been using it as my personal mail server since I began my AWS journey, so this was not something I wanted to ignore until the last minute.
This article is specific to AWS WorkMail, not Amazon SES. SES is a separate service and, at the time of writing, this retirement announcement is about WorkMail only.
Why I migrated
The main reason is obvious: WorkMail is being retired, so I needed to move away from it.
I also had another reason. In my opinion, AWS WorkMail had a basic UI with basic capabilities. To be fair, that was mostly all I needed. But for my personal setup it was not particularly cheap. I was paying for the WorkMail organisation and each mailbox had its own monthly cost. In total, I was paying around $30 per month.
When AWS announced the retirement, I wanted to act early. I did not want to leave it until the last minute and then rush the migration under pressure. It also gave me a good reason to review whether I could run my personal email setup in a cheaper and cleaner way.
What needed to be planned
The first thing I needed was an alternative.
After some investigation and comparing the pros and cons of a few options, I decided to use Microsoft Exchange Online. Some may say it is overkill for a personal email setup. I would say it is sustainable, affordable for my use case, feature rich, and easy enough to set up.
Below is the list I used to plan the migration:
- Domain ownership verification
- MX record reconfiguration
- Email migration from AWS WorkMail to Exchange Online
- How to reduce cost when creating mailboxes
- How many licensed mailboxes I actually needed
- User downtime risk and how to minimise it
- What to test before and after the cutover
DNS and domain considerations
I decided to keep my domain in AWS Route 53. I also avoided removing any existing DNS records too early because I did not want to risk losing emails in flight.
After setting up the new Microsoft Exchange Online subscription, I was able to verify ownership of my domain fairly quickly. This gave me room to manoeuvre. I could create the mailboxes, aliases, and shared mailboxes I needed before touching the MX records.
At the beginning, the DNS and domain side was straightforward. I only had to revisit it properly once I was ready to complete the cutover and point the MX records to Exchange Online.
Mailbox/user considerations
I decided to use only two licensed users: my account and my wife’s account. Only the two of us needed separate personal mailboxes.
For everything else, I used aliases and shared mailboxes.
I created a handful of aliases under my own user mailbox. I like doing this because it gives me a meaningful separation of email addresses without creating unnecessary paid mailboxes.
For emails that both of us need to manage, I created a few shared mailboxes and gave both of us access to read and manage them. When you create shared mailboxes in Exchange Online, Microsoft 365 creates the necessary underlying account objects. In my case, that was not an issue because the shared mailboxes were tied to the main licensed accounts for access and management.
To give a better picture of what I ended up with, this is a simplified version:
- My licensed account
- Alias 1
- Alias 2
- Alias 3
- Access to all shared mailboxes
- My wife’s licensed account
- Access to all shared mailboxes
- Shared mailbox 1
- Shared mailbox 2
- Shared mailbox 3
This reduced the number of paid accounts and made the setup easier to manage.
Cutover approach
The best approach I could think of was to set up all the mailboxes, shared mailboxes, and aliases I needed first, then leave AWS WorkMail in place until the end of the process. I wanted to continue receiving emails for as long as possible before changing the MX records.
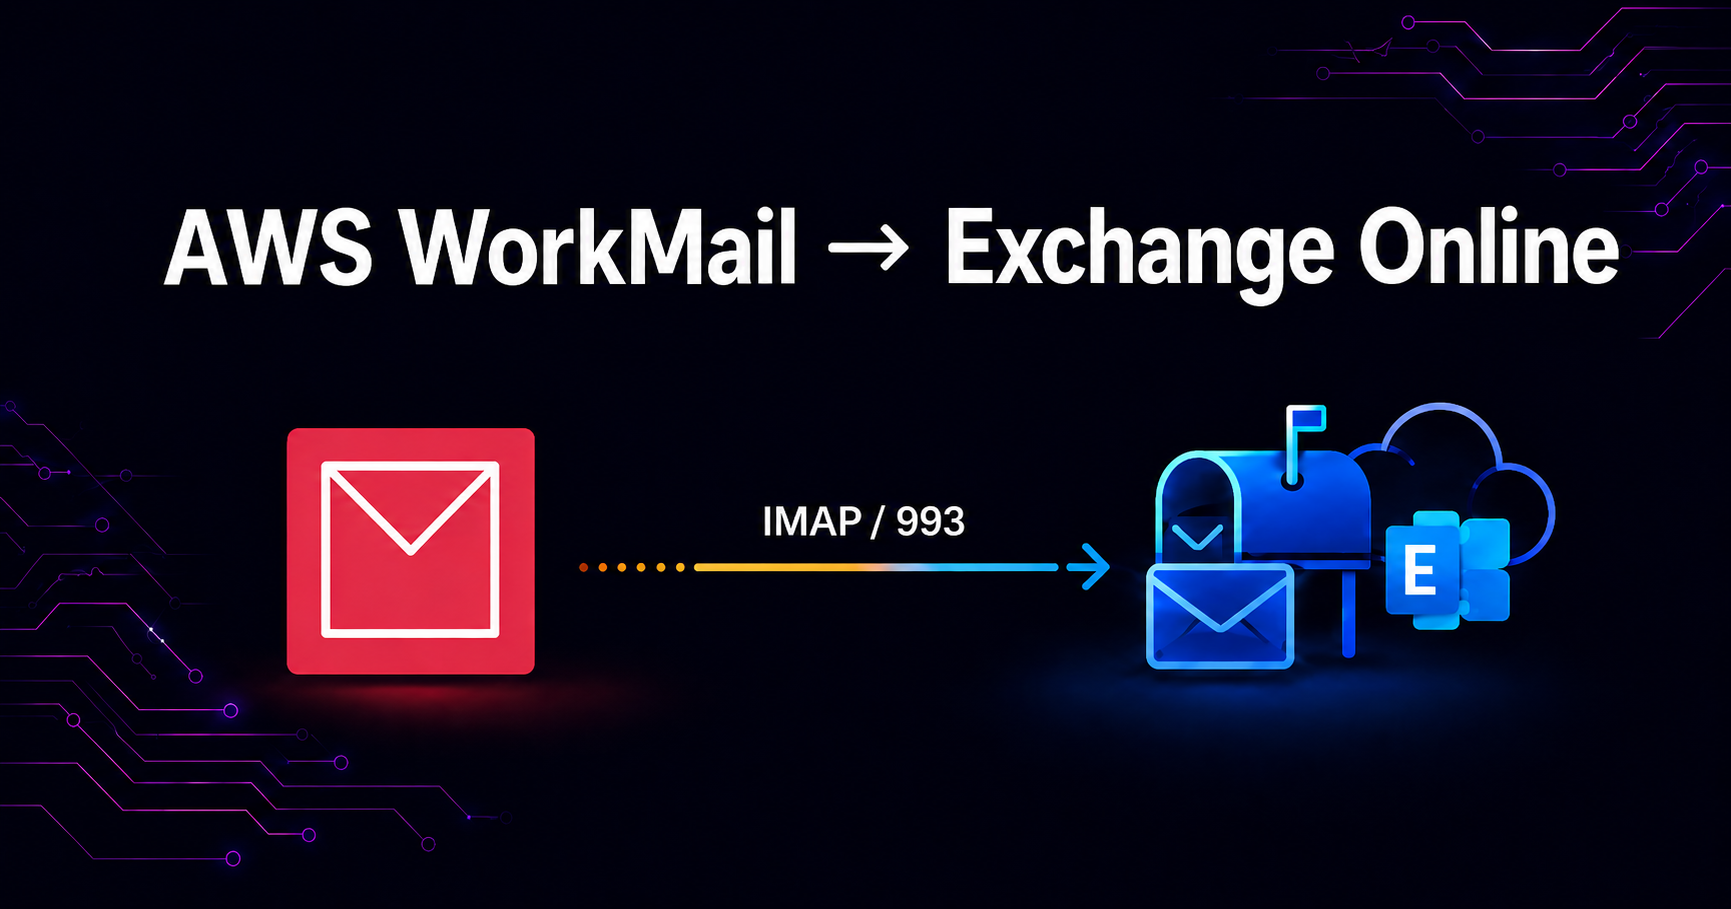
I then investigated how to migrate my existing emails from AWS WorkMail to Exchange Online. After around two hours of reading, testing, and trial and error, I landed on the migration tool inside the Exchange Admin Center. The migration type I needed was IMAP migration.
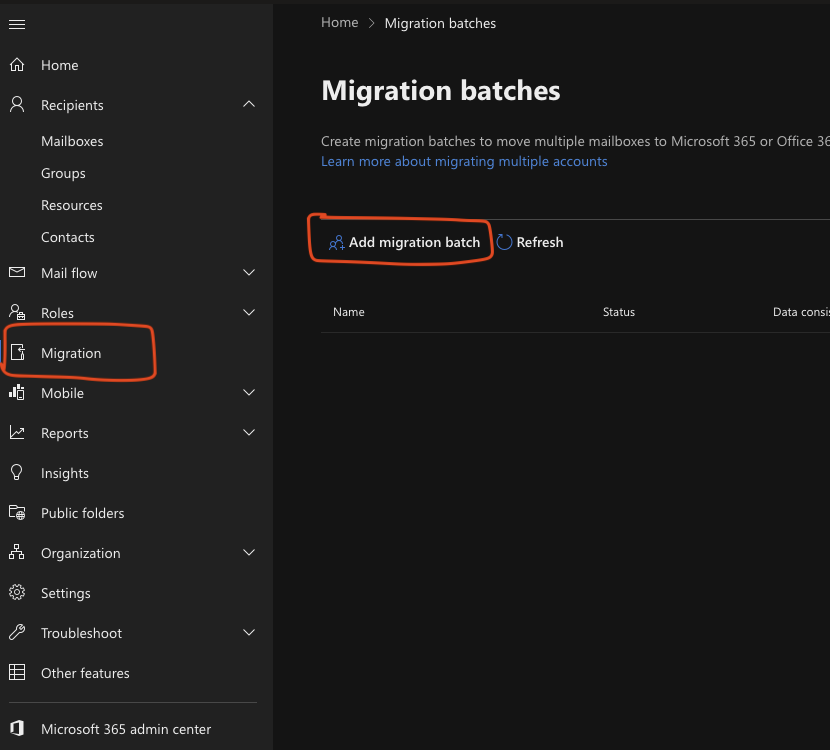
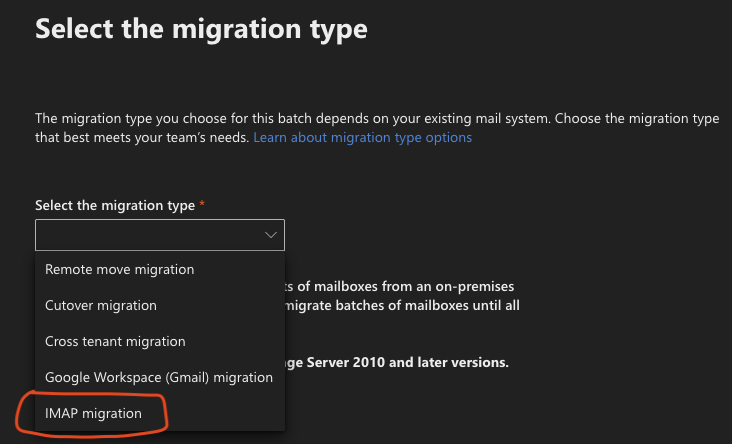
The Exchange Admin Center has a migration batch tool that lets you migrate mailboxes from different sources. In my case, I only needed IMAP migration.
Setting up access to my AWS WorkMail mailboxes from the Exchange IMAP migration tool took longer than I first expected. The tool requires a CSV file with the mailbox details. Yes, this includes passwords in plain text. It is what it is, but treat that file carefully and delete it when you no longer need it.
To save time and reduce pain, the CSV format must look like this:
EmailAddress,UserName,Password
myuser1@mydomain.co.uk,myuser1@mydomain.co.uk,mysuperstrongpassword
myuser2@mydomain.co.uk,myuser2@mydomain.co.uk,myevenstrongerpassword
myuser3@mydomain.co.uk,myuser3@mydomain.co.uk,someonessuperstrongpassword
Note that the values under EmailAddress and UserName are the same in this example. AWS WorkMail did not like me using only the username. It expected the full email address as the username.
After uploading the CSV file with all the source mailboxes listed, I was able to migrate and sync the emails from AWS WorkMail into the new Exchange Online mailboxes. The migration report showed the number of synced emails from the source. The migration brought across the inbox, sent items, and my custom folders.
Shared mailboxes can be added to the Outlook client app and appear under the main account. For Mac users, I had to add the shared mailbox through the legacy Outlook UI first, then switch back to the new UI. Adding the shared mailbox directly from the new Outlook UI did not work for me.
At this stage I had not reconfigured the MX records with the new Exchange Online details. Everything was still untouched in AWS WorkMail.
Testing before and after
Once the migration was done, I went back to the Exchange Admin Center and continued the email setup. Microsoft gave me the DNS records I needed to add, including the new MX record.
In AWS Route 53, I had to delete the existing MX record because editing it directly did not work cleanly for me. I did this quickly and carefully. In less than 10 minutes, the new records were in place and AWS WorkMail was no longer receiving new inbound email for the domain.
I then logged into my own mailbox and did a sanity check against the migrated data. To my surprise, because I had never done this before, things looked accurate. The migrated emails were there and the folders looked right.
For testing, I would recommend checking at least the following:
- Send an email from an external address to the new mailbox
- Send an email from Exchange Online to an external address
- Test replies, not just new messages
- Check aliases
- Check shared mailboxes
- Check Outlook desktop/mobile client access
- Check that old WorkMail mailboxes are no longer receiving new messages after the MX cutover
Mistakes or risks to avoid
I made a funny and expensive mistake when I first set up my email server in AWS WorkMail. I created a separate user account and a completely separate mailbox for almost every purpose.
I had my personal one, then another one for my wife, then another for family stuff, then another for something else, and then repeated that a few more times.
That approach is fine for millionaires who are not bothered about spending an extra $15 or $20 per month for a personal email server. For me, however, it was expensive. I am not financially free yet!
I did not make the same mistake again in my new Exchange Online subscription. I became best friends with aliases, shared mailboxes, and Outlook rules to move emails into the right folders. It is cheaper, easier to maintain, and has less configuration overhead.
Another risk is treating the migration like it is just a technical copy job. It is not. Email is boring until it breaks. If you are doing this for a business, even a small one, you need to think about downtime, DNS propagation, user access, shared mailboxes, and rollback options.
IMAP migration under the hood
An IMAP migration is best understood as a controlled mailbox copy.
Exchange Online does not magically move the mailbox from the source server. Instead, Microsoft 365 connects to the source mail server using IMAP, authenticates against each mailbox, reads the available mail folders, pulls the messages from those folders, and then writes them into the target Exchange Online mailbox.
For this to work, the target users and mailboxes must already exist in Microsoft 365 before the migration starts. The migration endpoint stores the source IMAP server connection details, and the migration batch uses the CSV mapping file to know which source mailbox maps to which target mailbox.
It is a simple and direct server-to-server copy process.
One important limitation: IMAP migration is mainly about email messages and mail folders. It does not migrate everything that exists in a full groupware mailbox. Contacts, calendar items, and tasks are not migrated through IMAP, so those need to be handled separately if they matter to you. This is easy to overlook because users often think of a mailbox as email, calendar, contacts, and settings all together. IMAP does not cover all of that.
flowchart LR
    A[AWS WorkMail
Source IMAP Server] -->|IMAPS connection
Port 993 / SSL| B[Microsoft 365
Migration Endpoint]
    B --> C[Exchange Online
Migration Batch]
    D[CSV Mapping File
source mailbox → target mailbox] --> C
    C -->|Authenticate to each source mailbox| A
    C -->|Copy email folders and messages| E[Exchange Online
Target Mailboxes]
    F[DNS MX Record Cutover] -->|New inbound mail routes to Microsoft 365| E
    G[Post-migration Validation] --> H[Check mail flow
Check mailbox content
Check user access]
    E --> G
Final thoughts
I found the process fairly straightforward, apart from the trial and error around the mailbox CSV file. If I had known the correct CSV format earlier, the whole process would have been much simpler.
For my small personal setup, I did not need a separate archive or backup workflow. I also avoided adding anything unnecessary around SES archiving or journaling because it would have added cost and complexity I did not need.
The key point is this: IMAP migration is not just a button-click task. It is a staged copy-and-cutover process. The mailbox data copy, DNS changes, user communication, Outlook reconfiguration, and final verification all need to be planned together.
The technical migration may be IMAP, but the real success factor is controlling disruption for the users.
If you encounter issues during the sync process, take a look at the Microsoft troubleshooting guide for IMAP mailbox migration.
What I would do differently next time
Next time, I would prepare the CSV file earlier and test it with one mailbox first. That would have saved me time and removed most of the guesswork.
I would also create a simple mailbox inventory before starting. Nothing complicated, just a small table showing each source mailbox, the target mailbox, whether it is licensed or shared, and whether it has aliases. For a personal migration this may feel unnecessary, but even a small checklist helps when DNS, passwords, mailboxes, and clients are all involved.
I would reduce the DNS TTL in advance where possible, then wait before doing the MX cutover. That gives you a better chance of a quicker and cleaner switch when you are ready.
For a larger or business-critical migration, I would also keep the migration batch running a little longer after the MX cutover and perform a final sync/validation before fully shutting down the old system. I got away with a simple process because my setup was small. I would not treat a business migration casually.
The biggest lesson is simple: do the boring preparation properly. The migration tool does the copy, but planning avoids the panic.